In today’s multi-monitor setups, adjusting the brightness of each display individually is essential for an optimal viewing experience. Whether you’re working late into the night, gaming, or simply browsing, the right brightness level can reduce eye strain and improve image clarity. However, changing the brightness on a second monitor, especially if it’s an LED display, can sometimes be confusing or frustrating. This article explores the intricacies of LED monitor brightness adjustment, explains why it matters, and provides practical guidance on how to customize brightness settings for your secondary display.
Understanding LED Displays and Brightness Control
What is an LED Monitor?
LED monitors are a type of LCD (liquid crystal display) that use light-emitting diodes (LEDs) as their backlighting source instead of traditional cold cathode fluorescent lamps (CCFLs). This technology offers several advantages, including thinner panels, better energy efficiency, and improved color accuracy. Because LEDs can be controlled more precisely, LED monitors often provide better brightness and contrast ratios compared to older LCD models. The result is a more vibrant and lifelike picture, making LED monitors particularly popular among graphic designers, photographers, and gamers who require high fidelity in color representation.
Most modern monitors, including those used as secondary displays, are LED-backlit. This means that brightness adjustments typically involve changing the intensity of the LED backlight rather than altering the LCD panel itself. Understanding this distinction is crucial for grasping how brightness controls work and why they might behave differently on a second monitor. Additionally, many LED monitors come equipped with features such as adaptive brightness, which automatically adjusts the screen’s brightness based on ambient light conditions, enhancing user comfort and reducing eye strain during prolonged use.
How Brightness is Measured and Controlled
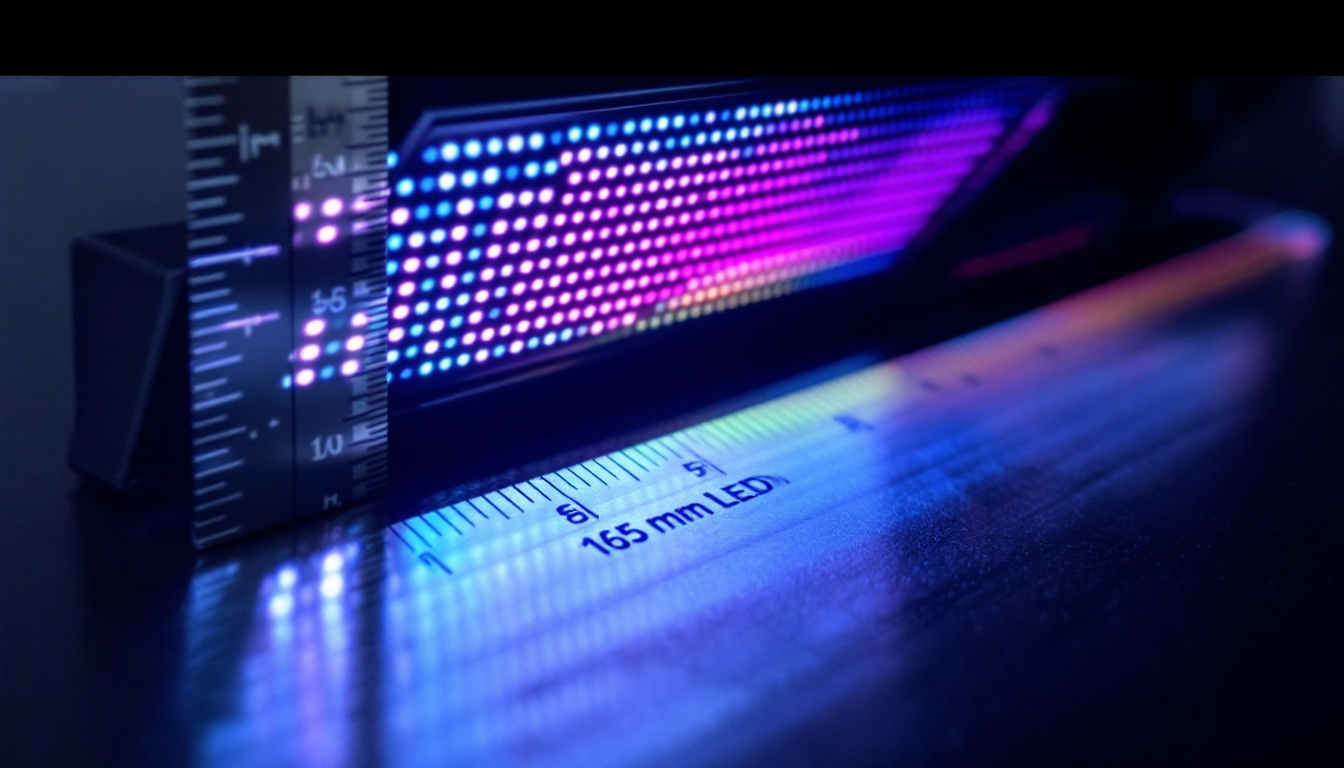
Brightness is measured in nits (candelas per square meter), which quantifies the amount of light emitted from the screen. Typical LED monitors range from 200 to 350 nits, with high-end models reaching up to 600 nits or more for HDR content. The brightness control adjusts the power supplied to the LEDs, increasing or decreasing the light output accordingly. This capability allows users to customize their viewing experience based on the environment, whether it’s a brightly lit office or a dimly lit room, ensuring optimal visibility and comfort.
On most monitors, brightness can be adjusted via physical buttons on the monitor itself or through software controls provided by the operating system or third-party applications. However, when dealing with a second monitor, especially one connected via HDMI, DisplayPort, or USB-C, brightness control might not be as straightforward. This is because some interfaces and drivers do not support software-based brightness adjustments for external displays, requiring manual changes on the monitor. Furthermore, some advanced monitors offer features like programmable presets for different tasks, allowing users to switch between settings tailored for gaming, photo editing, or general use with just a few clicks, enhancing productivity and user experience significantly.
Why Adjusting Brightness on a Second Monitor Matters
Reducing Eye Strain and Fatigue
One of the primary reasons to adjust brightness is to reduce eye strain. When two monitors have significantly different brightness levels, the eyes must constantly adapt when shifting focus between screens, leading to discomfort and fatigue. According to the American Optometric Association, improper brightness and contrast settings are among the leading causes of computer vision syndrome, which affects millions of users worldwide.
By matching the brightness levels of both monitors, users can create a more comfortable and consistent visual environment. This is particularly important for professionals who spend long hours in front of multiple screens, such as graphic designers, programmers, and financial analysts.
Improving Color Accuracy and Image Quality
Brightness impacts how colors and details appear on the screen. Overly bright or dim displays can distort colors, making it difficult to perform tasks that require precision, such as photo editing or video production. Adjusting the brightness on a second monitor ensures that images and videos look consistent across all screens, which is critical for maintaining color fidelity.
Optimizing Energy Consumption
LED monitors are energy-efficient, but brightness settings still affect power consumption. Higher brightness levels increase energy use and can shorten the lifespan of the LEDs. By fine-tuning brightness, users can balance performance and energy efficiency, extending the monitor’s longevity and reducing electricity costs.
Methods to Change Brightness on a Second Monitor
Using Monitor’s Built-in Controls
The most reliable way to adjust brightness on a second monitor is through its physical buttons or on-screen display (OSD) menu. Most LED monitors feature dedicated buttons that allow users to navigate settings and adjust brightness, contrast, and other parameters directly.
This method works independently of the computer’s operating system and is universally compatible with any connection type. However, it requires manual adjustment and may be less convenient if the monitor is positioned out of easy reach.
Adjusting Brightness via Operating System Settings
Windows and macOS offer built-in tools to adjust brightness, but their effectiveness depends on the hardware and drivers involved.
- Windows: For laptops and some all-in-one PCs, the brightness slider is accessible in the Action Center or Display Settings. However, for external monitors, this slider often controls only the primary display or may be disabled entirely.
- macOS: Similar to Windows, macOS allows brightness adjustments for built-in displays and some external monitors that support DDC/CI (Display Data Channel Command Interface). If the second monitor supports this protocol, brightness can be adjusted via System Preferences or third-party apps.
Unfortunately, many external LED monitors do not support software brightness control via the OS, limiting this method’s usefulness.
Using Third-Party Software
Several third-party applications enable brightness adjustment for external monitors by communicating with the monitor’s firmware using DDC/CI commands. Popular tools include:
- ClickMonitorDDC: A free Windows utility that allows users to adjust brightness, contrast, and volume for multiple monitors.
- Monitorian: A lightweight Windows app designed for quick brightness control of external displays.
- Lunar: A macOS app that adjusts brightness and contrast for external monitors supporting DDC/CI.
These tools can be highly effective but require that the monitor supports DDC/CI and that the connection type allows for such communication. HDMI and DisplayPort generally support DDC/CI, but USB-C implementations vary.
Calibrating Brightness with Hardware Calibration Tools
For professionals requiring precise brightness and color accuracy, hardware calibration devices like the X-Rite i1Display Pro or Datacolor SpyderX are invaluable. These tools measure the monitor’s output and adjust settings to achieve optimal brightness and color profiles.
While primarily used for color calibration, these devices also help ensure that brightness levels are consistent across multiple monitors, including secondary LED displays. Calibration software often provides step-by-step guidance to adjust brightness and other parameters accurately.
Common Challenges and Solutions When Adjusting Second Monitor Brightness
Monitor Does Not Respond to Software Brightness Controls
One of the most frequent issues is that the second monitor’s brightness cannot be changed via the operating system or third-party apps. This often occurs because the monitor does not support DDC/CI or because the connection type or graphics driver does not facilitate brightness control commands.
Solution: Use the monitor’s physical buttons to adjust brightness manually. Additionally, ensure that DDC/CI is enabled in the monitor’s OSD settings, as some monitors disable this feature by default. Updating graphics drivers and monitor firmware can also improve compatibility.
Brightness Levels Appear Inconsistent Between Monitors
Even after adjusting brightness, users may notice that colors and brightness do not match perfectly between the primary and secondary monitors. This discrepancy can be due to differences in panel technology, age, or factory calibration.
Solution: Use calibration tools to create custom color profiles for each monitor. Adjusting contrast and gamma settings alongside brightness can also help harmonize the visual output. In some cases, replacing an older monitor with a model that matches the primary display’s specifications may be necessary for the best results.
Automatic Brightness Adjustments Interfering with Manual Settings
Some monitors and operating systems feature automatic brightness adjustment based on ambient light sensors. While useful in some scenarios, this can conflict with manual brightness settings, causing the display to fluctuate unexpectedly.
Solution: Disable automatic brightness or adaptive brightness features in both the monitor’s OSD and the operating system’s display settings. This ensures that manual adjustments remain consistent.
Tips for Optimal Brightness Settings on Multi-Monitor Setups
Match Brightness Levels Across Monitors
To create a seamless visual workspace, aim to match the brightness levels of all monitors as closely as possible. This reduces eye strain and improves workflow efficiency. Use a calibration tool or software to measure and adjust brightness accurately.
Adjust Brightness According to Ambient Lighting
Brightness should be adapted to the surrounding environment. In brightly lit rooms, higher brightness may be necessary, while dim environments benefit from lower brightness to reduce glare and fatigue. Consider using smart lighting solutions or ambient light sensors to automate this process.
Consider the Purpose of Each Monitor
Different tasks may require different brightness settings. For example, a monitor used primarily for reading documents might be set to a lower brightness than one used for photo editing. Tailor brightness settings to the specific use case of each display.
Regularly Recalibrate Your Monitors
Over time, LED backlights can degrade, causing brightness and color shifts. Regular calibration—every few months—is recommended to maintain consistent and accurate display performance.
Conclusion
Adjusting the brightness on a second LED monitor is a nuanced process influenced by hardware capabilities, connection types, and user preferences. Understanding how LED backlighting works and the limitations of software controls is essential for effectively managing brightness levels. Whether through manual adjustments on the monitor, operating system settings, third-party software, or professional calibration tools, users have multiple options to optimize their multi-monitor experience.
Proper brightness adjustment not only enhances visual comfort and reduces eye strain but also ensures color accuracy and energy efficiency. By following the guidelines and troubleshooting tips outlined in this article, users can achieve a balanced and harmonious multi-monitor setup that supports productivity and well-being.
Explore Cutting-Edge LED Display Solutions
Now that you understand the importance of proper brightness adjustment for your multi-monitor setup, take your visual experience to the next level with LumenMatrix’s innovative LED display technology. Whether you’re looking to enhance your brand visibility or create a captivating visual experience, LumenMatrix offers a wide range of solutions including Indoor and Outdoor LED Wall Displays, Vehicle LED Displays, and more. Elevate your visual communication and engage your audience like never before. Check out LumenMatrix LED Display Solutions today and see the difference cutting-edge technology can make.