How To Measure TV For Wall Mount: LED Display Explained
Mounting a TV on the wall can enhance the aesthetics of a room while also freeing up valuable floor space. However, before proceeding with the installation, it’s crucial to measure the TV correctly to ensure a secure and visually appealing setup. This article will guide you through the process of measuring your TV for wall mounting, specifically focusing on LED displays.
Understanding TV Measurements
Before diving into the measurement process, it’s essential to understand how TV sizes are defined. The size of a TV is typically measured diagonally from one corner of the screen to the opposite corner. This measurement is expressed in inches and is a standard way to denote the size of the television. It’s important to note that this diagonal measurement does not account for the bezels or frames that may surround the screen, which can vary significantly between models. Therefore, when planning for installation, it’s wise to consider the overall footprint of the TV, including any additional space required for ventilation and cable management.
Aspect Ratio
modern LED TVs generally have an aspect ratio of 16:9, which means the width is 16 units for every 9 units of height. Understanding this ratio is vital for determining the appropriate wall space for your TV. Knowing the aspect ratio helps in visualizing how the TV will fit into the designated area, ensuring that it complements the room’s overall design. Additionally, the aspect ratio influences the viewing experience, particularly when watching movies or shows that may be formatted in different ratios, such as 4:3 or 21:9. This can affect how content is displayed, leading to potential letterboxing or cropping, which is why it’s essential to consider the aspect ratio when choosing a TV for specific viewing preferences.
Screen Dimensions
While the diagonal measurement is the most common reference, knowing the actual width and height of the TV is equally important. These dimensions can usually be found in the product specifications or user manual. Measuring the width and height will assist in selecting the right mount and determining the best viewing height. Furthermore, understanding the screen dimensions can help you assess how the TV will interact with other furniture in the room, such as sofas or entertainment centers. For instance, a larger TV might require a more substantial stand or a wall mount that can support its weight, while also ensuring that it is positioned at an optimal height for comfortable viewing. Additionally, considering the distance between the TV and seating can enhance the overall viewing experience, as different screen sizes may require varying distances for the best picture quality and comfort.
Tools Needed for Measurement
Before starting the measurement process, gather the necessary tools to ensure accuracy. Having the right tools will make the task easier and more efficient.
Measuring Tape
A measuring tape is essential for obtaining precise measurements. Opt for a tape that is at least 25 feet long to accommodate larger TVs. A flexible tape is preferable as it can easily wrap around corners and edges.
Level
Using a level is crucial for ensuring that the TV is mounted straight. An unevenly mounted TV can be visually unappealing and may even lead to issues with viewing angles. A small bubble level will suffice for this purpose.
Pencil and Paper
Having a pencil and paper handy allows for jotting down measurements and notes. This step is particularly useful if you plan to compare different mounting locations or TV sizes.
Measuring Your TV
With tools in hand, it’s time to measure the TV. This step involves taking several key measurements to ensure a proper fit.
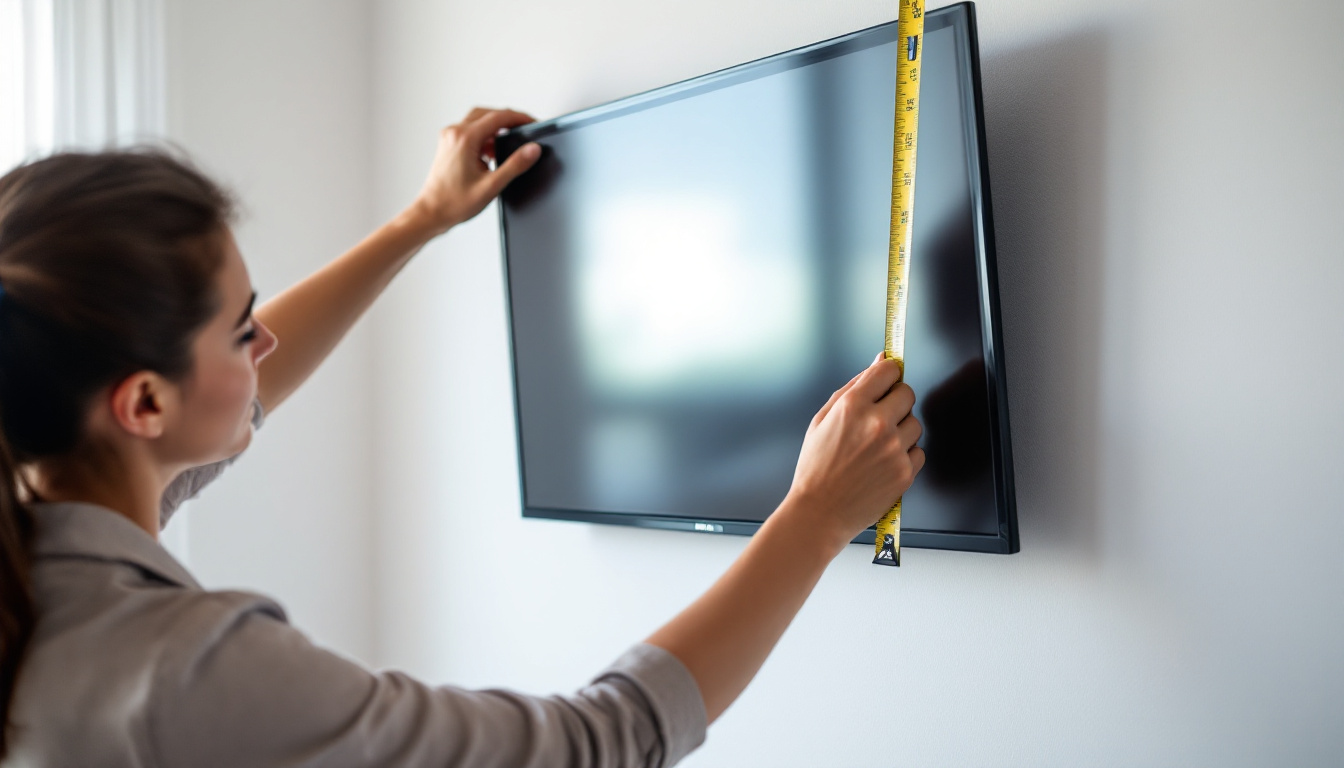
Diagonal Measurement
Start by measuring the diagonal size of the TV. Place the measuring tape at one corner of the screen and extend it to the opposite corner. Take note of this measurement, as it will help you identify the appropriate mount and determine the overall size of the wall space needed.
Width and Height
Next, measure the width and height of the TV. For width, measure from the left edge to the right edge of the screen. For height, measure from the top edge to the bottom edge. These dimensions are critical for ensuring that the TV fits within the desired wall space and aligns with other furniture or decor in the room.
Depth of the TV
While not always considered, the depth of the TV is also an important measurement. This dimension will help in determining how far the TV will protrude from the wall once mounted. It’s particularly relevant if there are shelves or other items placed near the TV.
Choosing the Right Wall Mount
Once the measurements are complete, the next step is to select an appropriate wall mount. The right mount will ensure stability and safety for the TV.
Types of Wall Mounts
There are several types of wall mounts available, each with its advantages and disadvantages. The most common types include fixed mounts, tilting mounts, and full-motion mounts. Fixed mounts hold the TV flat against the wall, while tilting mounts allow for a slight upward or downward angle. Full-motion mounts provide the most flexibility, allowing the TV to swivel and extend away from the wall.
Weight Capacity
When selecting a wall mount, it is crucial to consider the weight capacity. Each mount has a specified weight limit, and exceeding this limit can lead to disastrous consequences. Ensure that the mount can support the weight of your TV, which can usually be found in the product specifications.
VESA Compatibility
The Video Electronics Standards Association (VESA) has established a standard for mounting hole patterns on the back of TVs. Ensure that the wall mount you choose is compatible with your TV’s VESA pattern. This information can typically be found in the TV’s manual or product specifications.
Preparing the Wall for Mounting
Before mounting the TV, it’s essential to prepare the wall properly. This step ensures that the installation is secure and that the TV is positioned correctly.
Finding the Right Location
Choose a location that provides a comfortable viewing angle. Ideally, the center of the screen should be at eye level when seated. Use the measurements taken earlier to visualize how the TV will fit in the space. Consider factors such as glare from windows and proximity to power outlets.
Stud Finder
Using a stud finder is crucial for locating the wall studs, which provide the necessary support for the TV mount. Mounting the TV directly to the drywall is not recommended, as it may not support the weight of the TV. Once the studs are located, mark their positions with a pencil.
Leveling the Mount
Before securing the mount to the wall, use a level to ensure that it is straight. An uneven mount can lead to an unbalanced appearance and may affect the viewing experience. Adjust the mount as necessary before finalizing the installation.
Installing the Wall Mount
With the wall prepared, the next step is to install the wall mount. This process requires careful attention to detail to ensure a secure installation.
Drilling Holes
Using a drill, create holes in the wall where the mount will be secured. Ensure that the holes align with the marked positions of the wall studs. It’s essential to use the appropriate drill bit size for the anchors or screws being used.
Securing the Mount
Once the holes are drilled, attach the wall mount to the wall using the provided screws or anchors. Make sure to tighten the screws securely, but avoid over-tightening, which can damage the wall or the mount.
Attaching the TV
After the mount is securely attached to the wall, the next step is to attach the TV. Depending on the type of mount, this may involve sliding the TV onto the mount or securing it with screws. Follow the manufacturer’s instructions carefully to ensure proper installation.
Final Adjustments and Cable Management
Once the TV is mounted, it’s time to make any final adjustments and set up cable management for a clean look.
Adjusting the Viewing Angle
If using a tilting or full-motion mount, adjust the TV to the desired angle for optimal viewing. Take a moment to step back and ensure that the TV is positioned correctly and looks visually appealing in the space.
Cable Management Solutions
To maintain a tidy appearance, consider using cable management solutions. This can include cable covers, raceways, or even in-wall cable management systems. Proper cable management not only improves aesthetics but also reduces the risk of tripping hazards.
Testing the Setup
Finally, turn on the TV and test the setup. Make sure that the picture quality is satisfactory and that there are no issues with the viewing angle. Adjust the settings as necessary to achieve the best viewing experience.
Conclusion
Measuring a TV for wall mounting is a straightforward process that requires careful attention to detail. By understanding the measurements, selecting the right wall mount, and preparing the wall properly, anyone can achieve a professional-looking installation. With the right tools and techniques, mounting a TV can enhance the overall ambiance of a room while providing a comfortable viewing experience.
Whether you are a DIY enthusiast or a first-time installer, following these guidelines will ensure that your TV is mounted securely and looks great in your living space. Enjoy your newly mounted TV and the benefits of a clean, organized entertainment area!
Enhance Your Viewing Experience with LumenMatrix
Ready to take your entertainment setup to the next level? LumenMatrix offers an extensive range of LED display solutions that can transform any space into a dynamic visual showcase. From sleek Indoor LED Wall Displays to vibrant Outdoor LED Wall Displays, and even specialized options like Vehicle LED Displays and LED Sports Displays, LumenMatrix is your go-to source for advanced LED technology. Elevate your viewing experience with displays that offer unparalleled brightness, clarity, and reliability. Check out LumenMatrix LED Display Solutions today and see how our innovative products can make your message shine.